


We recently purchased a new to us home, and although there are many things we love about the home, the kitchen wasn’t quite our style. In addition to that, the kitchen color scheme didn’t flow well with the rest of the home. The previous owners had painted most of the interior white and light gray, very light and airy colors, while the kitchen remained very dark and mostly brown. When we put in our offer, my husband and I had right away talked about changing the kitchen and upon moving in had a company over to discuss replacing the countertops. Having built a few custom homes we had an idea on what the price would be for our space and after being given a quote and determining other changes we wanted to make throughout our home, we decided it wasn’t an area we wanted to allocate that much money to at the moment. I came across multiple video reviews on TikTok and Instagram of others in a similar position that were using a countertop marble kit to change their countertops for a small fraction of the cost of replacing. At this point I knew we would be replacing within the next few years anyway so figured we had nothing to lose, and potentially a whole lot to gain, by trying it. 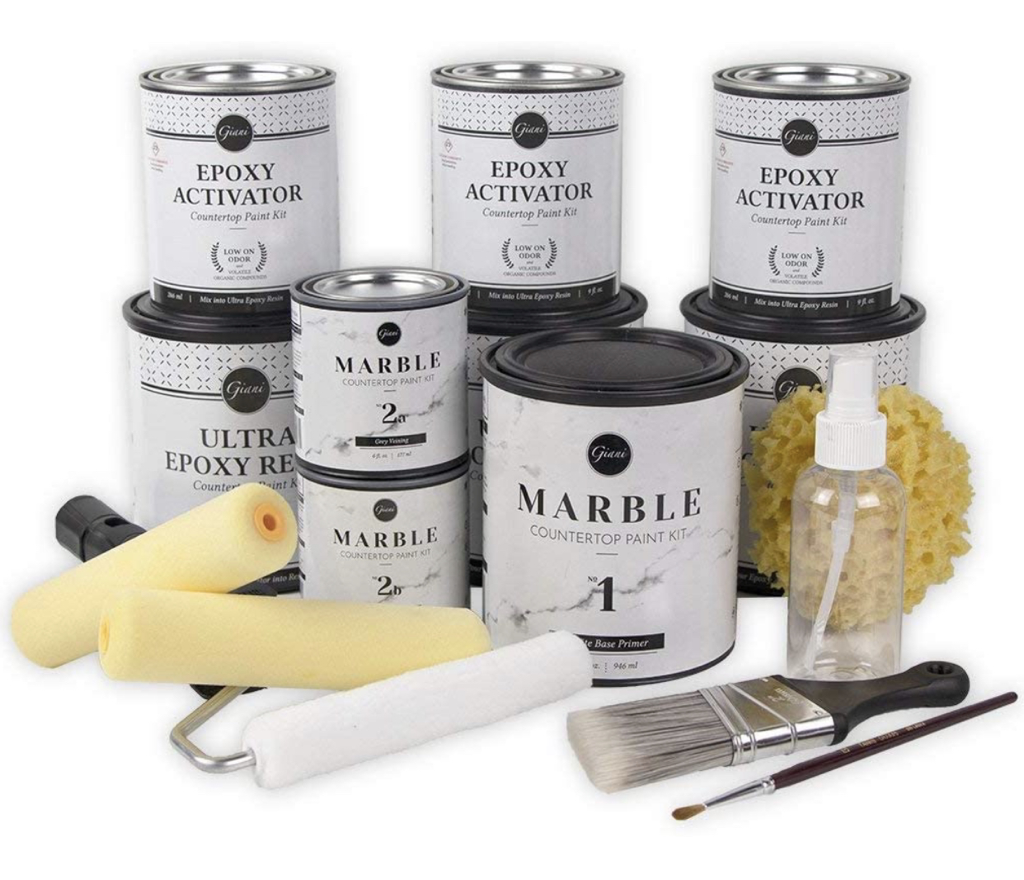 After plenty of research and reading every review I could find, we decided to go for it! It was about $170 and I ordered it on Amazon. Due to the amount of space we were covering and that our previous counters were very dark, I ended up ordering another can of the first step “#1” (about $30) to ensure full coverage. 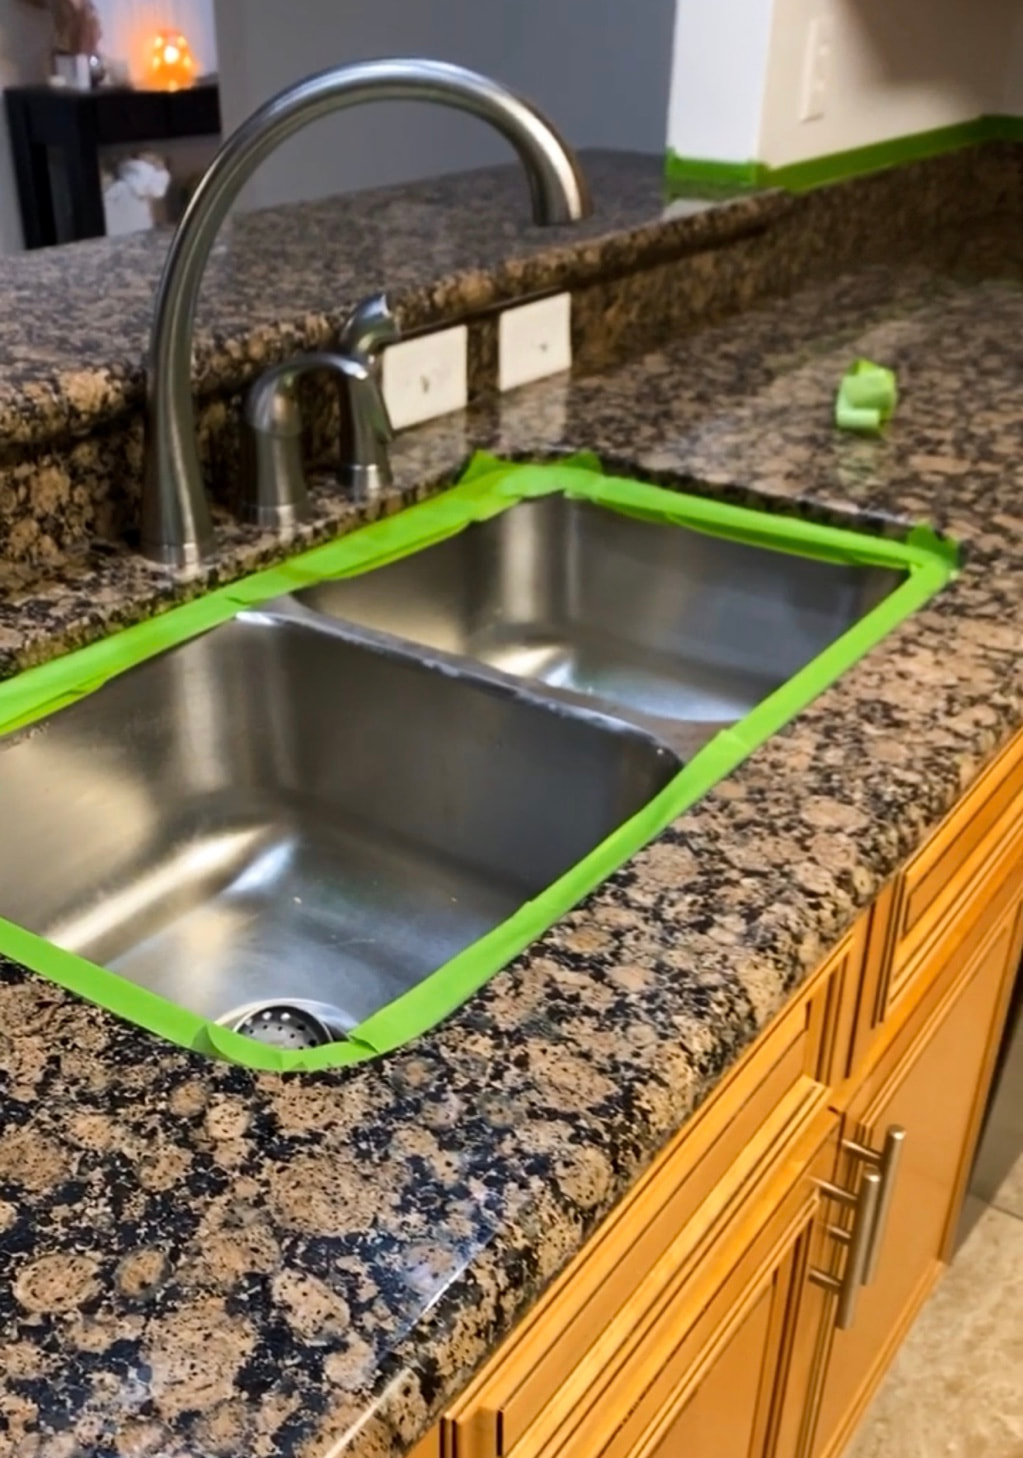 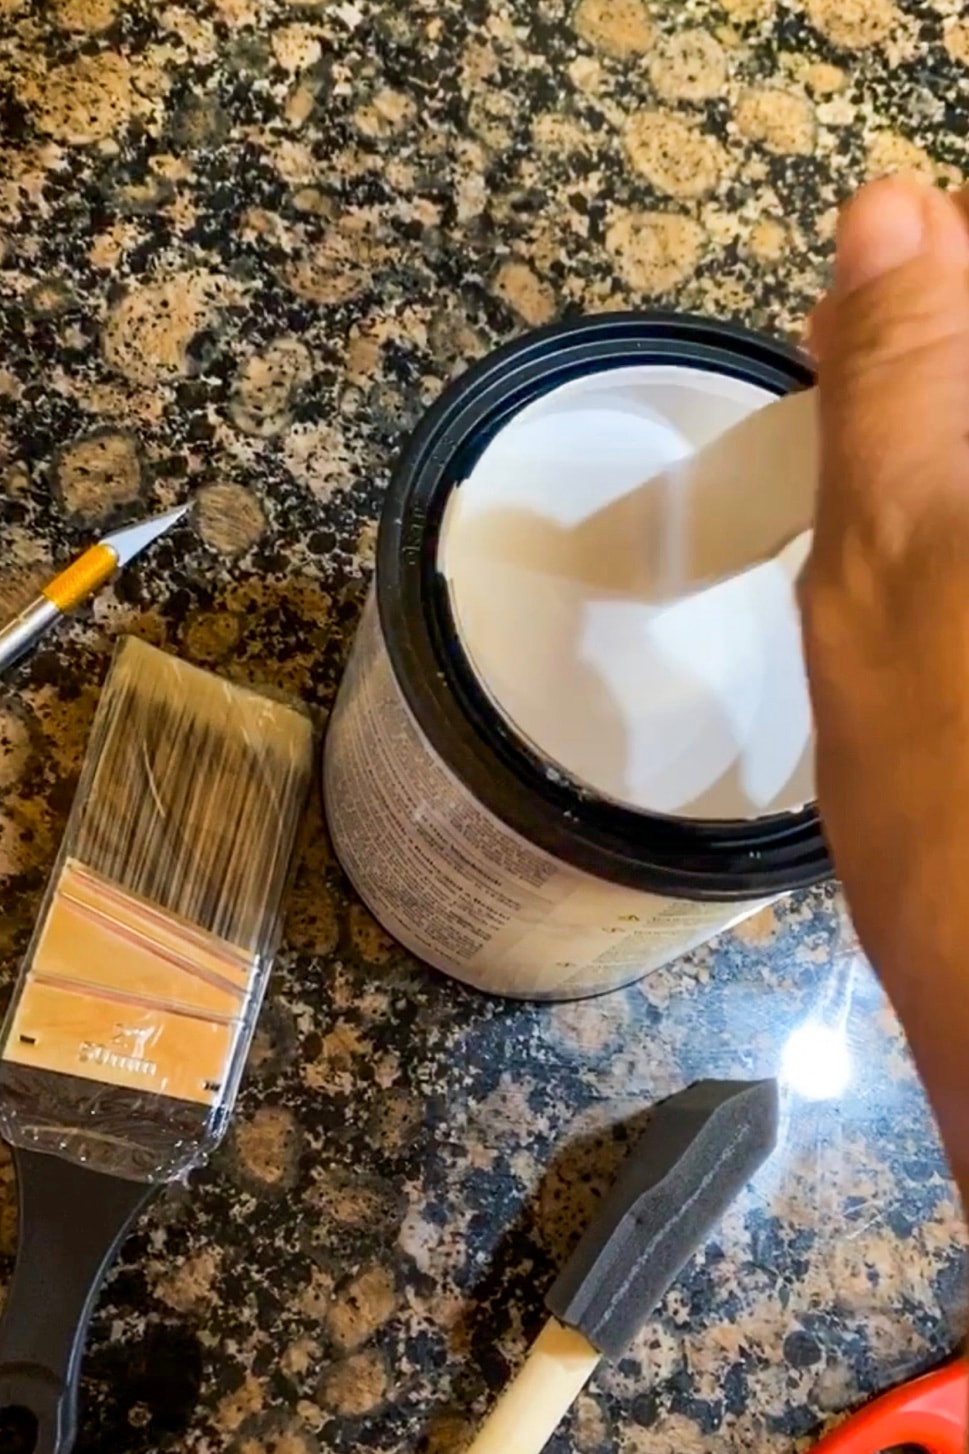 We watched the manufacturer’s video tutorial and followed the instructions provided to a T. We had zero DIY experience and found this to be simple with a low level of difficulty. The kit even comes with all of the brushes and tools needed to complete the project.  After one coat⬇️ 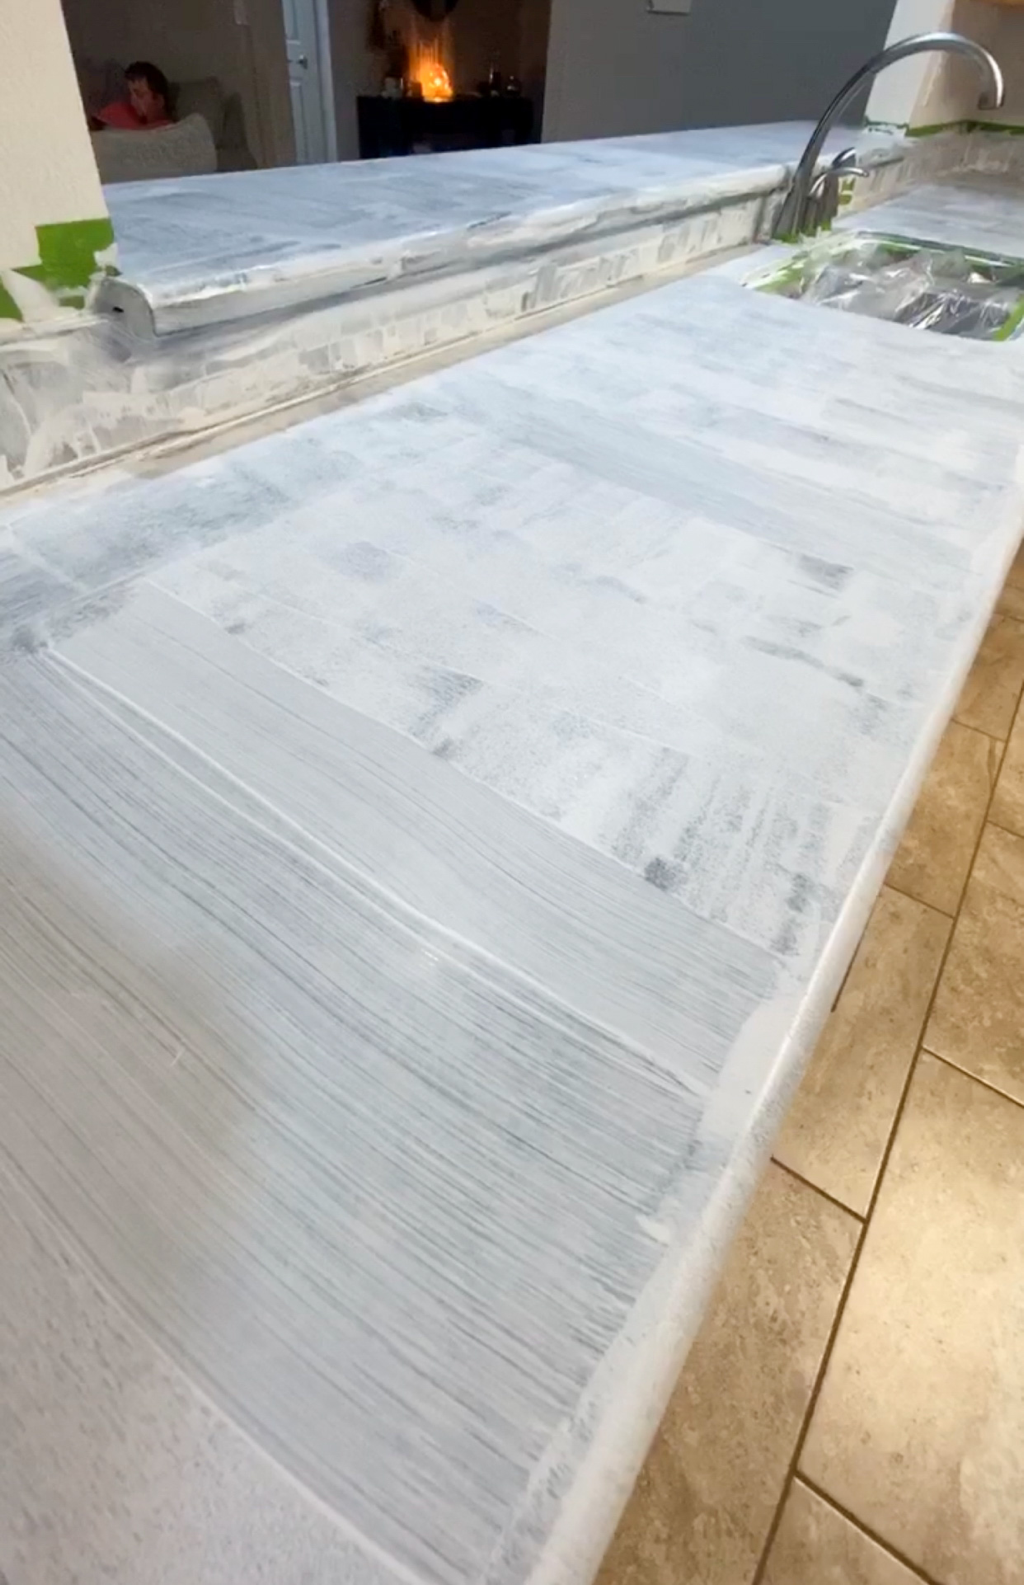 I will admit after one coat it looked quite scary! We ended up needing four coats to fully cover the dark granite. I think the hardest part was hand drawing on the gray marbling. I first sketched my desired design out on paper to get an idea of how it would flow from one counter spot to the next. The directions provided in the were very helpful for this as well. If you mess up you can quickly wipe away the marbling lines and start over which made the process much less stressful (though you have to be sure to wipe up your mistakes FAST)! 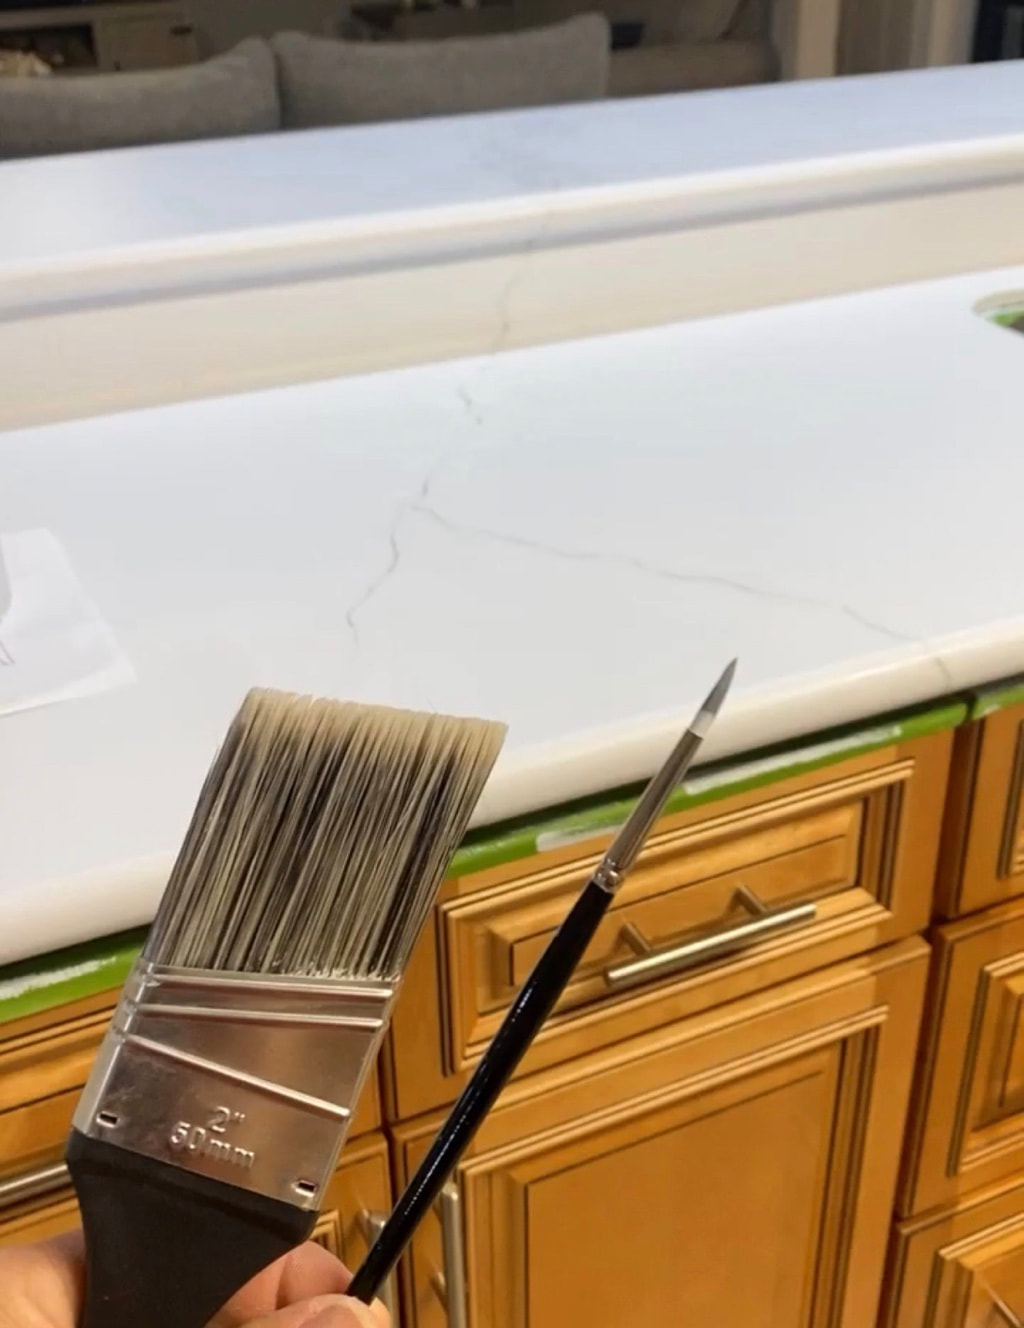 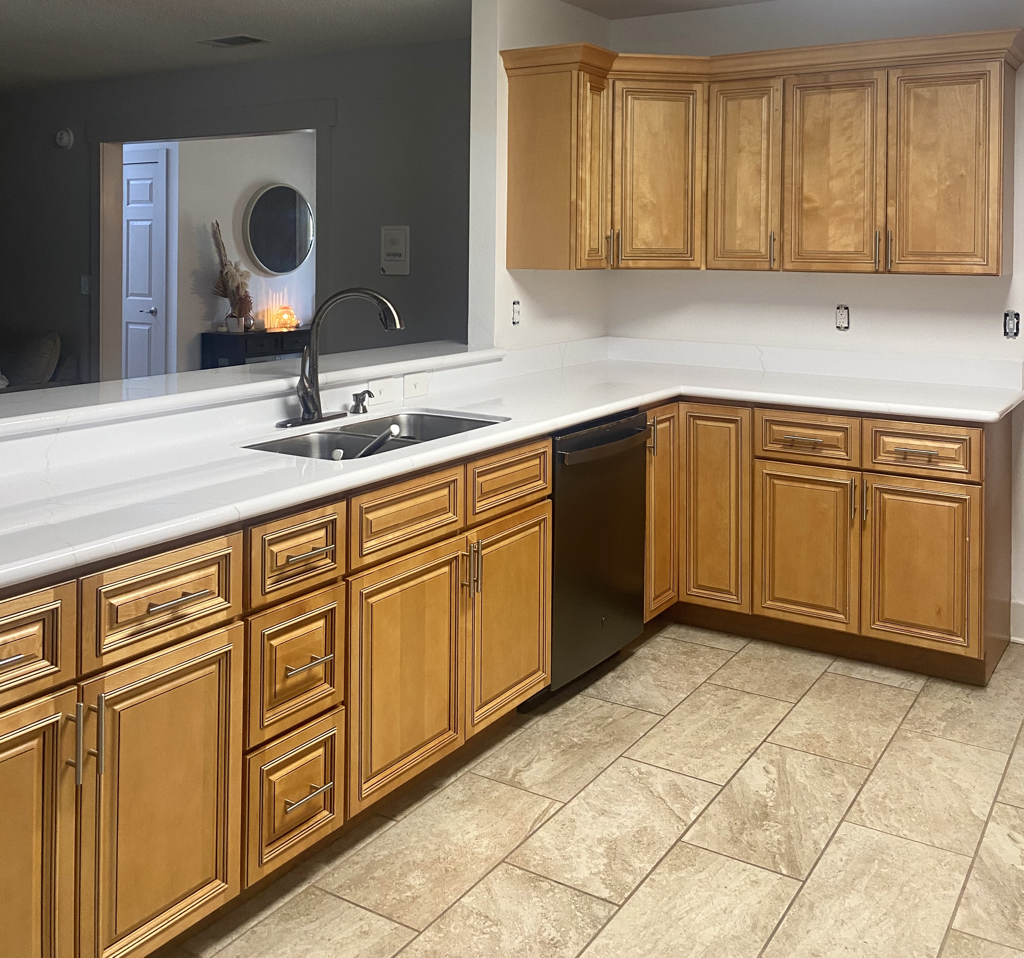 We waited the full suggested time before setting anything on top of the counters afterwards to allow it to fully cure, and have had zero issues with it so far. We do plan to do a full replacement and switch them out for quartz down the road but for now we are so happy with the change, and it only cost us about $200! Stay tuned because our next project will be painting the cabinets! |
FOLLOW US ON INSTAGRAM @BLANKERSREALESTATE AND FACEBOOK JERRY BLANKERS-MULJAT GROUP NORTH
POST COMPILED BY HALEY PARKER // HALEYPARKERSTYLE.COM @HALEYPARKERSTYLE

